SDL_image は, BMP, JPEG, PNG, PNM などの画像ファイルを扱う機能を持ったライブラリ.
目次
【サイト内の関連ページ】
Windows での Visual Studio Community 2022 のインストール: 別ページ »で説明している.なお,Visual Studio には,ビルドツール(Build Tools)が含まれている.
Windows での ビルドツール for Visual Studio 2022 (Build Tools for Visual Studio 2022) のインストール: 別ページ »で説明している.
【関連する外部ページ】
Gitは,バージョン管理システム.ソースコードの管理や複数人での共同に役立つ.
【サイト内の関連ページ】
Windows での Git のインストール: 別ページ »で説明している.
【関連する外部ページ】
Git の公式ページ: https://git-scm.com/
CMake はビルドツールである.
【サイト内の関連ページ】
Windows での cmake のインストール: 別ページ »で説明している.
【関連する外部ページ】
CMake の公式ダウンロードページ: https://cmake.org/download/
Windows での Python 3.10 のインストール,pip と setuptools の更新: 別ページ »で説明している.
Python の公式ページ: https://www.python.org/
Windows での SDL2 のインストール: 別ページ »で説明している.
コマンドプロンプトを管理者として実行: 別ページ »で説明
C:
cd %HOMEPATH%
rmdir /s /q SDL_image
![[image]](4743.png)
cd %HOMEPATH%
git clone --recursive https://github.com/libsdl-org/SDL_image
![[image]](4741.png)
cmake でのオプションについて
cmake のオプションの 「Visual Studio 17 2022」のところは, 使用する Visual Studio のバージョンにあわせること. Visual Studio 2022 のときは,「Visual Studio 17 2022」. Visual Studio 2019 のときは,「Visual Studio 16 2019」
cmake の実行手順例は次の通り
cd %HOMEPATH%
cd SDL_image
rmdir /s /q build
mkdir build
cd build
del CMakeCache.txt
cmake .. -G "Visual Studio 17 2022" -A x64 -T host=x64 ^
    -DCMAKE_BUILD_TYPE=Release ^
    -DSDL2_MAIN_LIBRARY="C:/sdl/lib/SDL2main.lib" ^
    -DCMAKE_INSTALL_PREFIX="c:/sdl"
![[image]](4740.png)
※ 下の通りになるとは限らない.エラーメッセージが出るなど場合は,前で cmake を実行したときの設定を変えてやり直す.
![[image]](4739.png)
![[image]](4738.png)
コマンドプロンプトを管理者として実行: 別ページ »で説明
次のコマンドを実行
powershell -command "[System.Environment]::SetEnvironmentVariable(\"SDL_IMAGE_ROOT\", \"C:\sdl\", \"Machine\")"
![[image]](4737.png)
コマンドプロンプトを管理者として実行: 別ページ »で説明
次のコマンドを実行
powershell -command "$oldpath = [System.Environment]::GetEnvironmentVariable(\"Path\", \"Machine\"); $oldpath += \";C:\sdl\bin\"; [System.Environment]::SetEnvironmentVariable(\"Path\", $oldpath, \"Machine\")"
cd %HOMEPATH%
cd SDL_image\build\Release
copy *.exe C:\sdl\bin
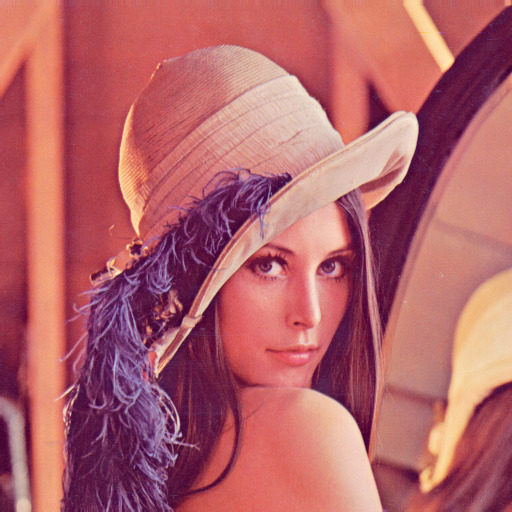
SDL_image の機能を使い JPEG ファイルなどを表示するプログラムを起動してみる. JPEG ファイルは何でも良いが,ここでは,lena_std.jpg を使ってみる.
c:\sdl\bin\showimage.exe lena_std.jpg
![[image]](4744.png)
画像ファイルはヘッダが付いていたり,しばしば圧縮されている.画像ファイルの種類もいろいろある. SDL_image を使うと,こうしたことを気にしなくて済む.
次の仮定を置く
/* SDL を用いた画像読み込みファイルプログラム */


#include<stdlib.h>
#include<stdio.h>
#include<string.h>

#include "SDL.h"
#include "SDL_image.h"

int main(int argc, char *argv[])
{
  SDL_Surface *image;
  int i, j;
  int r, g, b;

  /* Check command line usage */
  if ( ! argv[1] ) {
    fprintf(stderr, "Usage: %s <image_file>\n", argv[0]);
    return(1);
  }

  /* Open the image file */
  image = IMG_Load(argv[1]);
  if ( image == NULL ) {
    fprintf(stderr, "Couldn't load %s: %s\n", argv[1], SDL_GetError());
  }

  for ( i = 0; i < image->h; i++ ) {
      for ( j = 0; j < image->w; j++ ) {
    // 1画素の R, G, B 成分は1バイトであること.画像データは隙間無くならんでいること.R, G, B の順に並んでいることを仮定している.
    unsigned char* p = (unsigned char*)image->pixels;
    int pixel_at = (i * (image->w) + j ) * image->format->BytesPerPixel;
    r = p[pixel_at];
    g = p[pixel_at + 1];
    b = p[pixel_at + 2];
    fprintf(stderr, "%d, %d = (%d, %d, %d)\n", i, j, r, g, b);
      }
  }

  fprintf( stderr, "image->format->BytesPerPixel = %d", image->format->BytesPerPixel );
  fprintf( stderr, "image->w = %d", image->w );
  fprintf( stderr, "image->h = %d", image->h );

  /* We're done! */
  SDL_Quit();
  return(0);
}
view.cpp のところは実際のファイル名に読み替えてください.
g++ -I/usr/local/include/SDL -o a.exe view.cpp -lSDL_image -lSDL -lpthread -lm
![[image]](553.png)
テストデータ: 24.bmp
実行結果の例
![[image]](4777.png)
![[image]](4778.png)
本サイトは金子邦彦研究室のWebページである.
資料等の公開では,原則,「クリエイティブコモンズ BY NC SA」として公開するようにしている. PDFファイル,パワーポイントファイルなどには, 「クリエイティブコモンズ BY NC SA」を明記するとともに,ロゴを記載するようにしている(作業が間に合っていない分もあるのでご容赦ください).
公開している資料をご利用になる場合の,再配布の条件,剽窃の防止などについて,別ページ »で説明 再配布や資料改変の際には,そのページをご確認ください.
サイトマップは,サイトマップのページをご覧下さい. 本サイト内の検索は,サイト内検索のページをご利用下さい.
問い合わせ先: 金子邦彦(かねこ くにひこ) ![[image]](https://www.kkaneko.jp/info/kanekomail.png)